Tag: play center

Interactive Play Space: Veterinarian Office

interactiveplayspaces

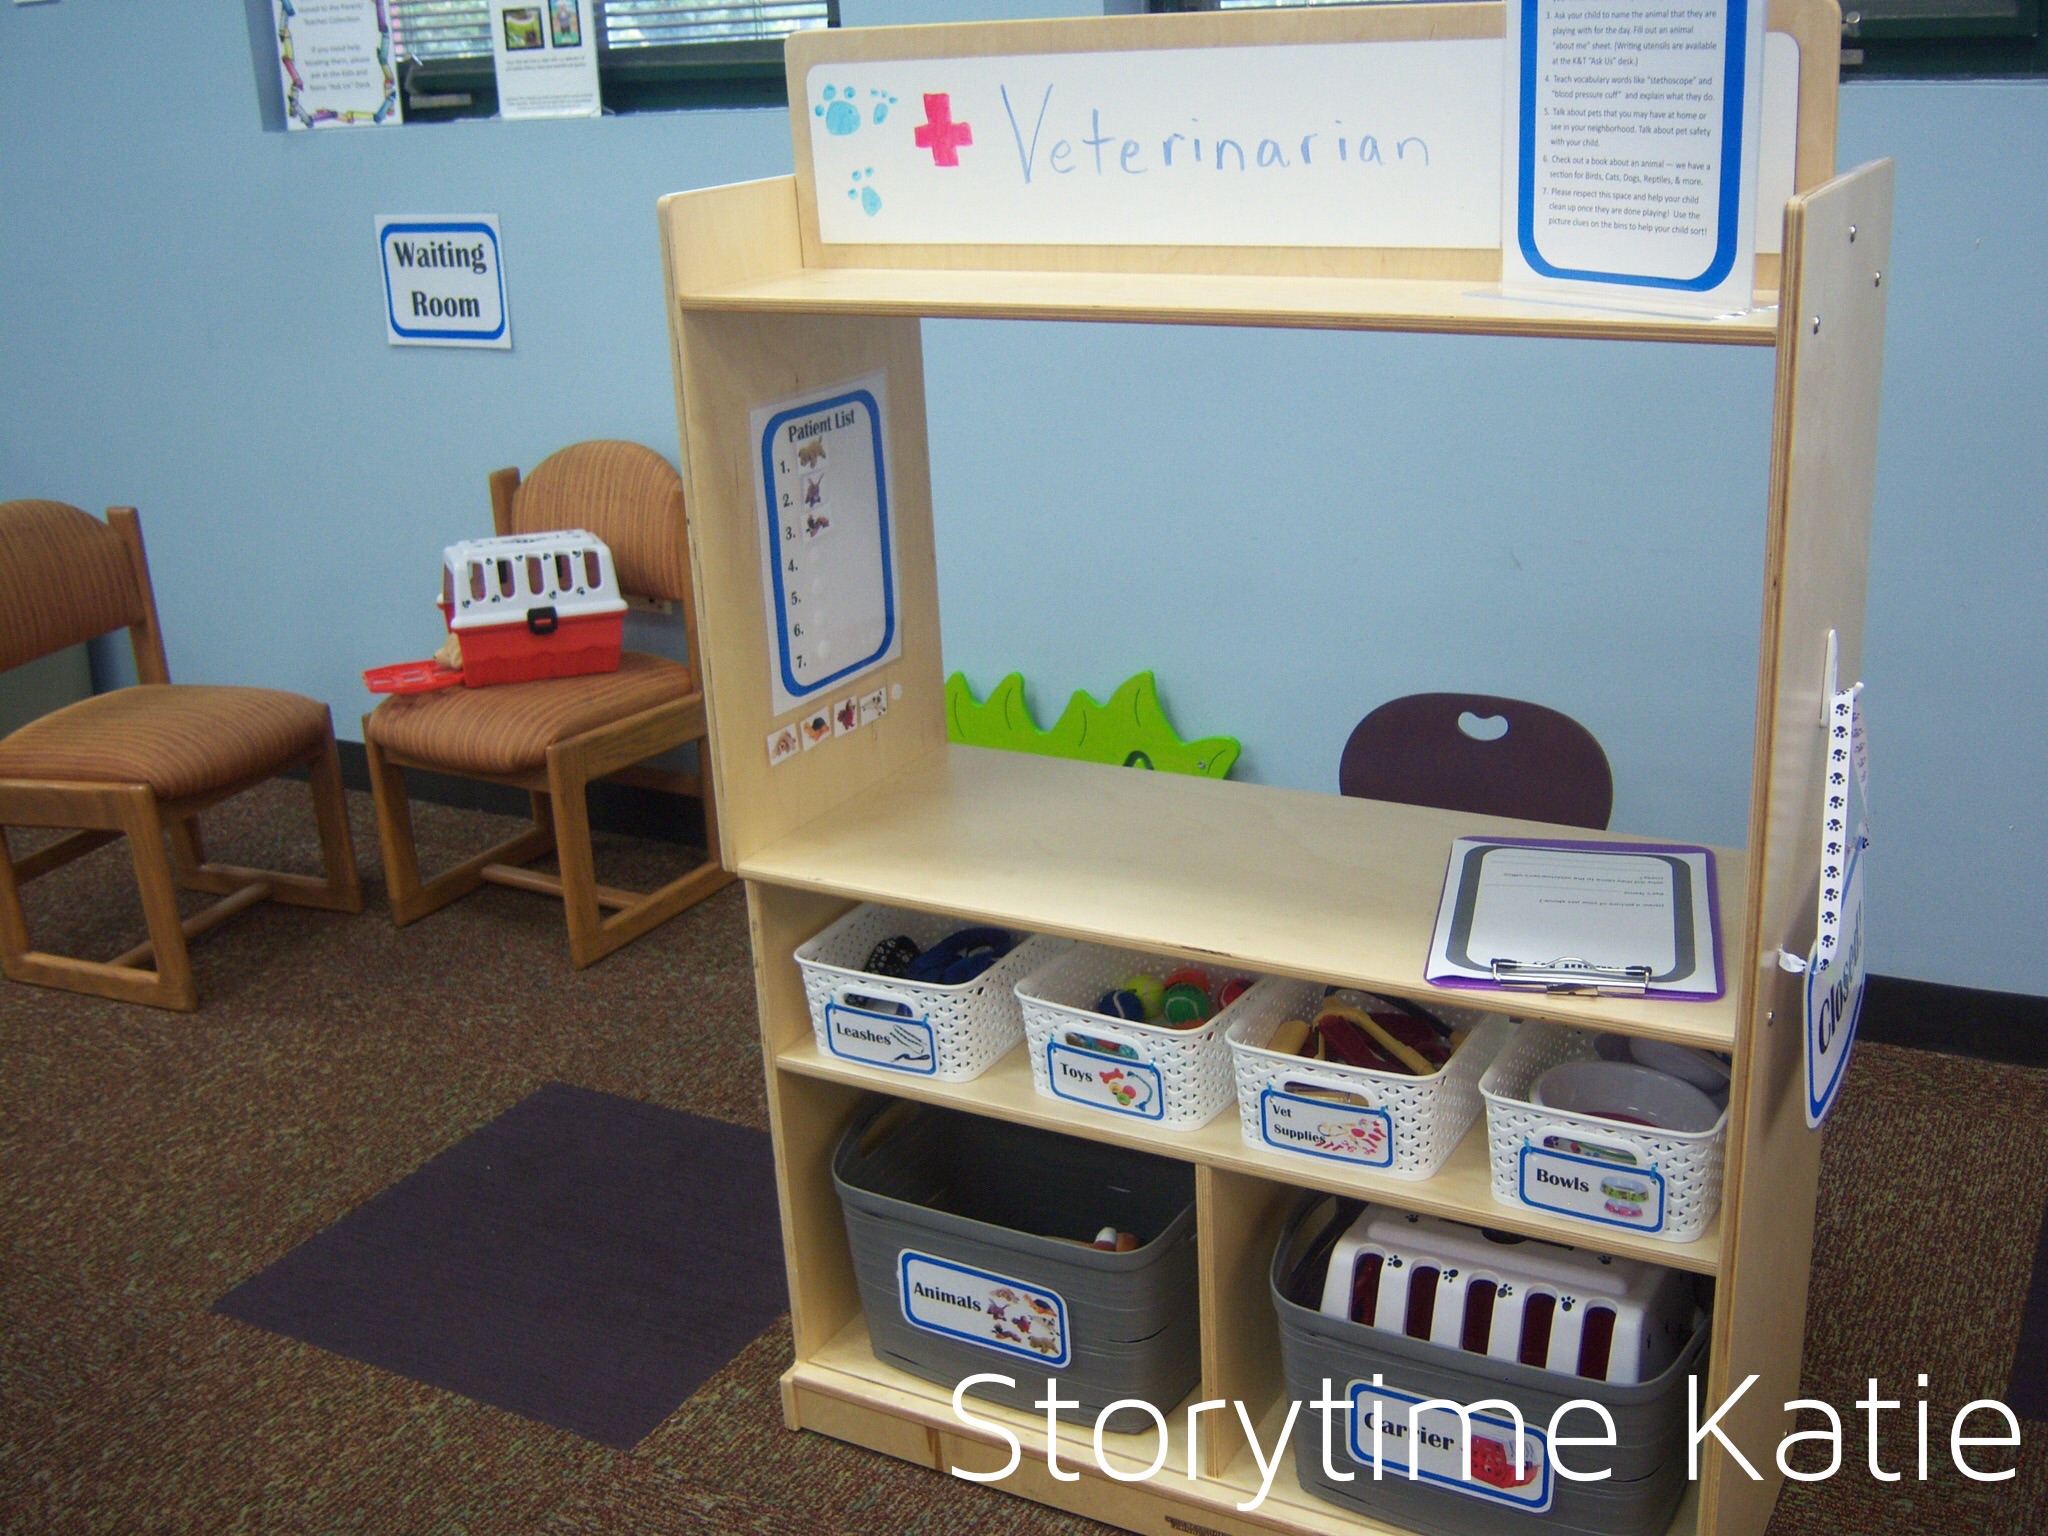
After I took down our Bakery shop, I wanted to go with a quicker and easier play center. I present…the Veterinarian Office:

image

[A quick recap of the reusuable supplies: Constructive Playthings Create It Space, Target White Plastic Bins, & Target Grey Plastic Bins.]


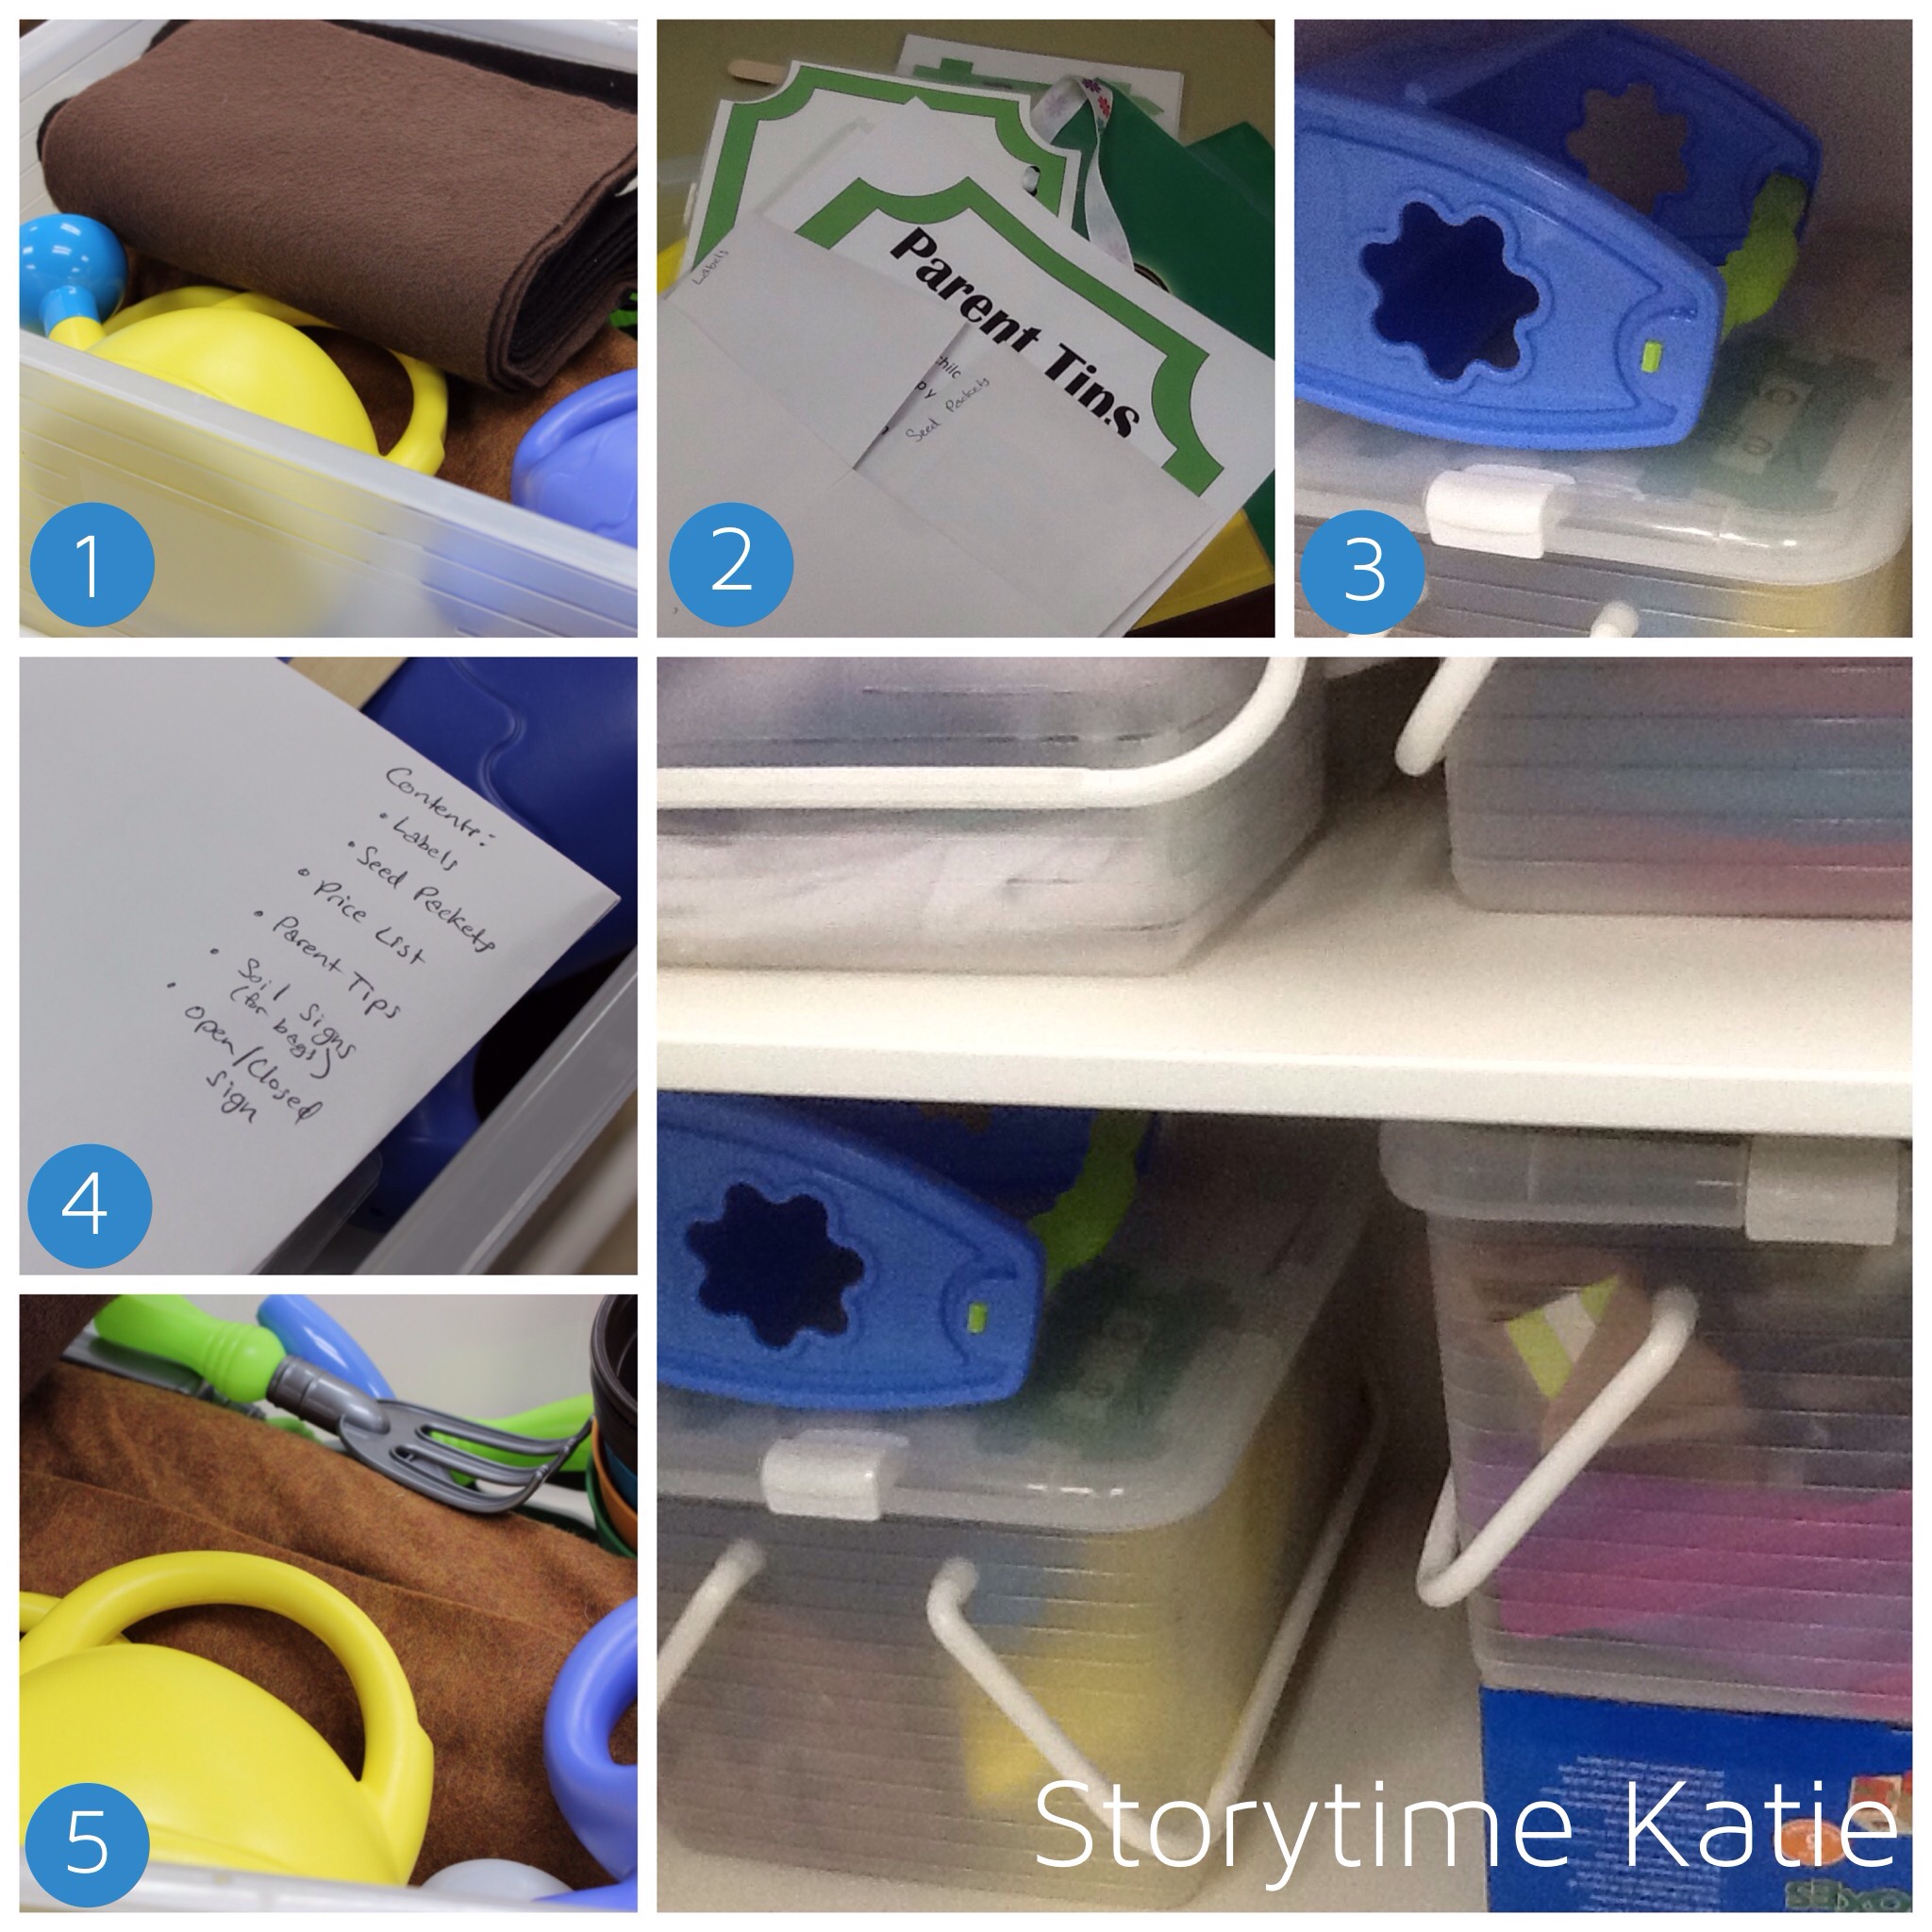
Here’s the break-down on each of the items including cost and where to get them!

image

1. Patient List: $3.79 for Velcro from Michaels.
This was a hand-made item. I laminated the blank Patient List and also laminated pictures for each animal in our center. I used the Velcro dots to make this an area for kids to practice ordering. I wanted to provide this option for the children who are not yet writing to be able to “take” patients and ordering/sorting is a great early math skill.

2. Waiting Room: no cost.
I pulled some extra chairs from another area of the library and used them to create a waiting room for the patients and their owners to wait in. Originally, I planned on pulling old magazines and stocking the area with them but I was concerned that they’d be mixed up in the library’s general collection. The kids have brought their own reading material though — if the piles of books I’ve seen around the space are any indication.

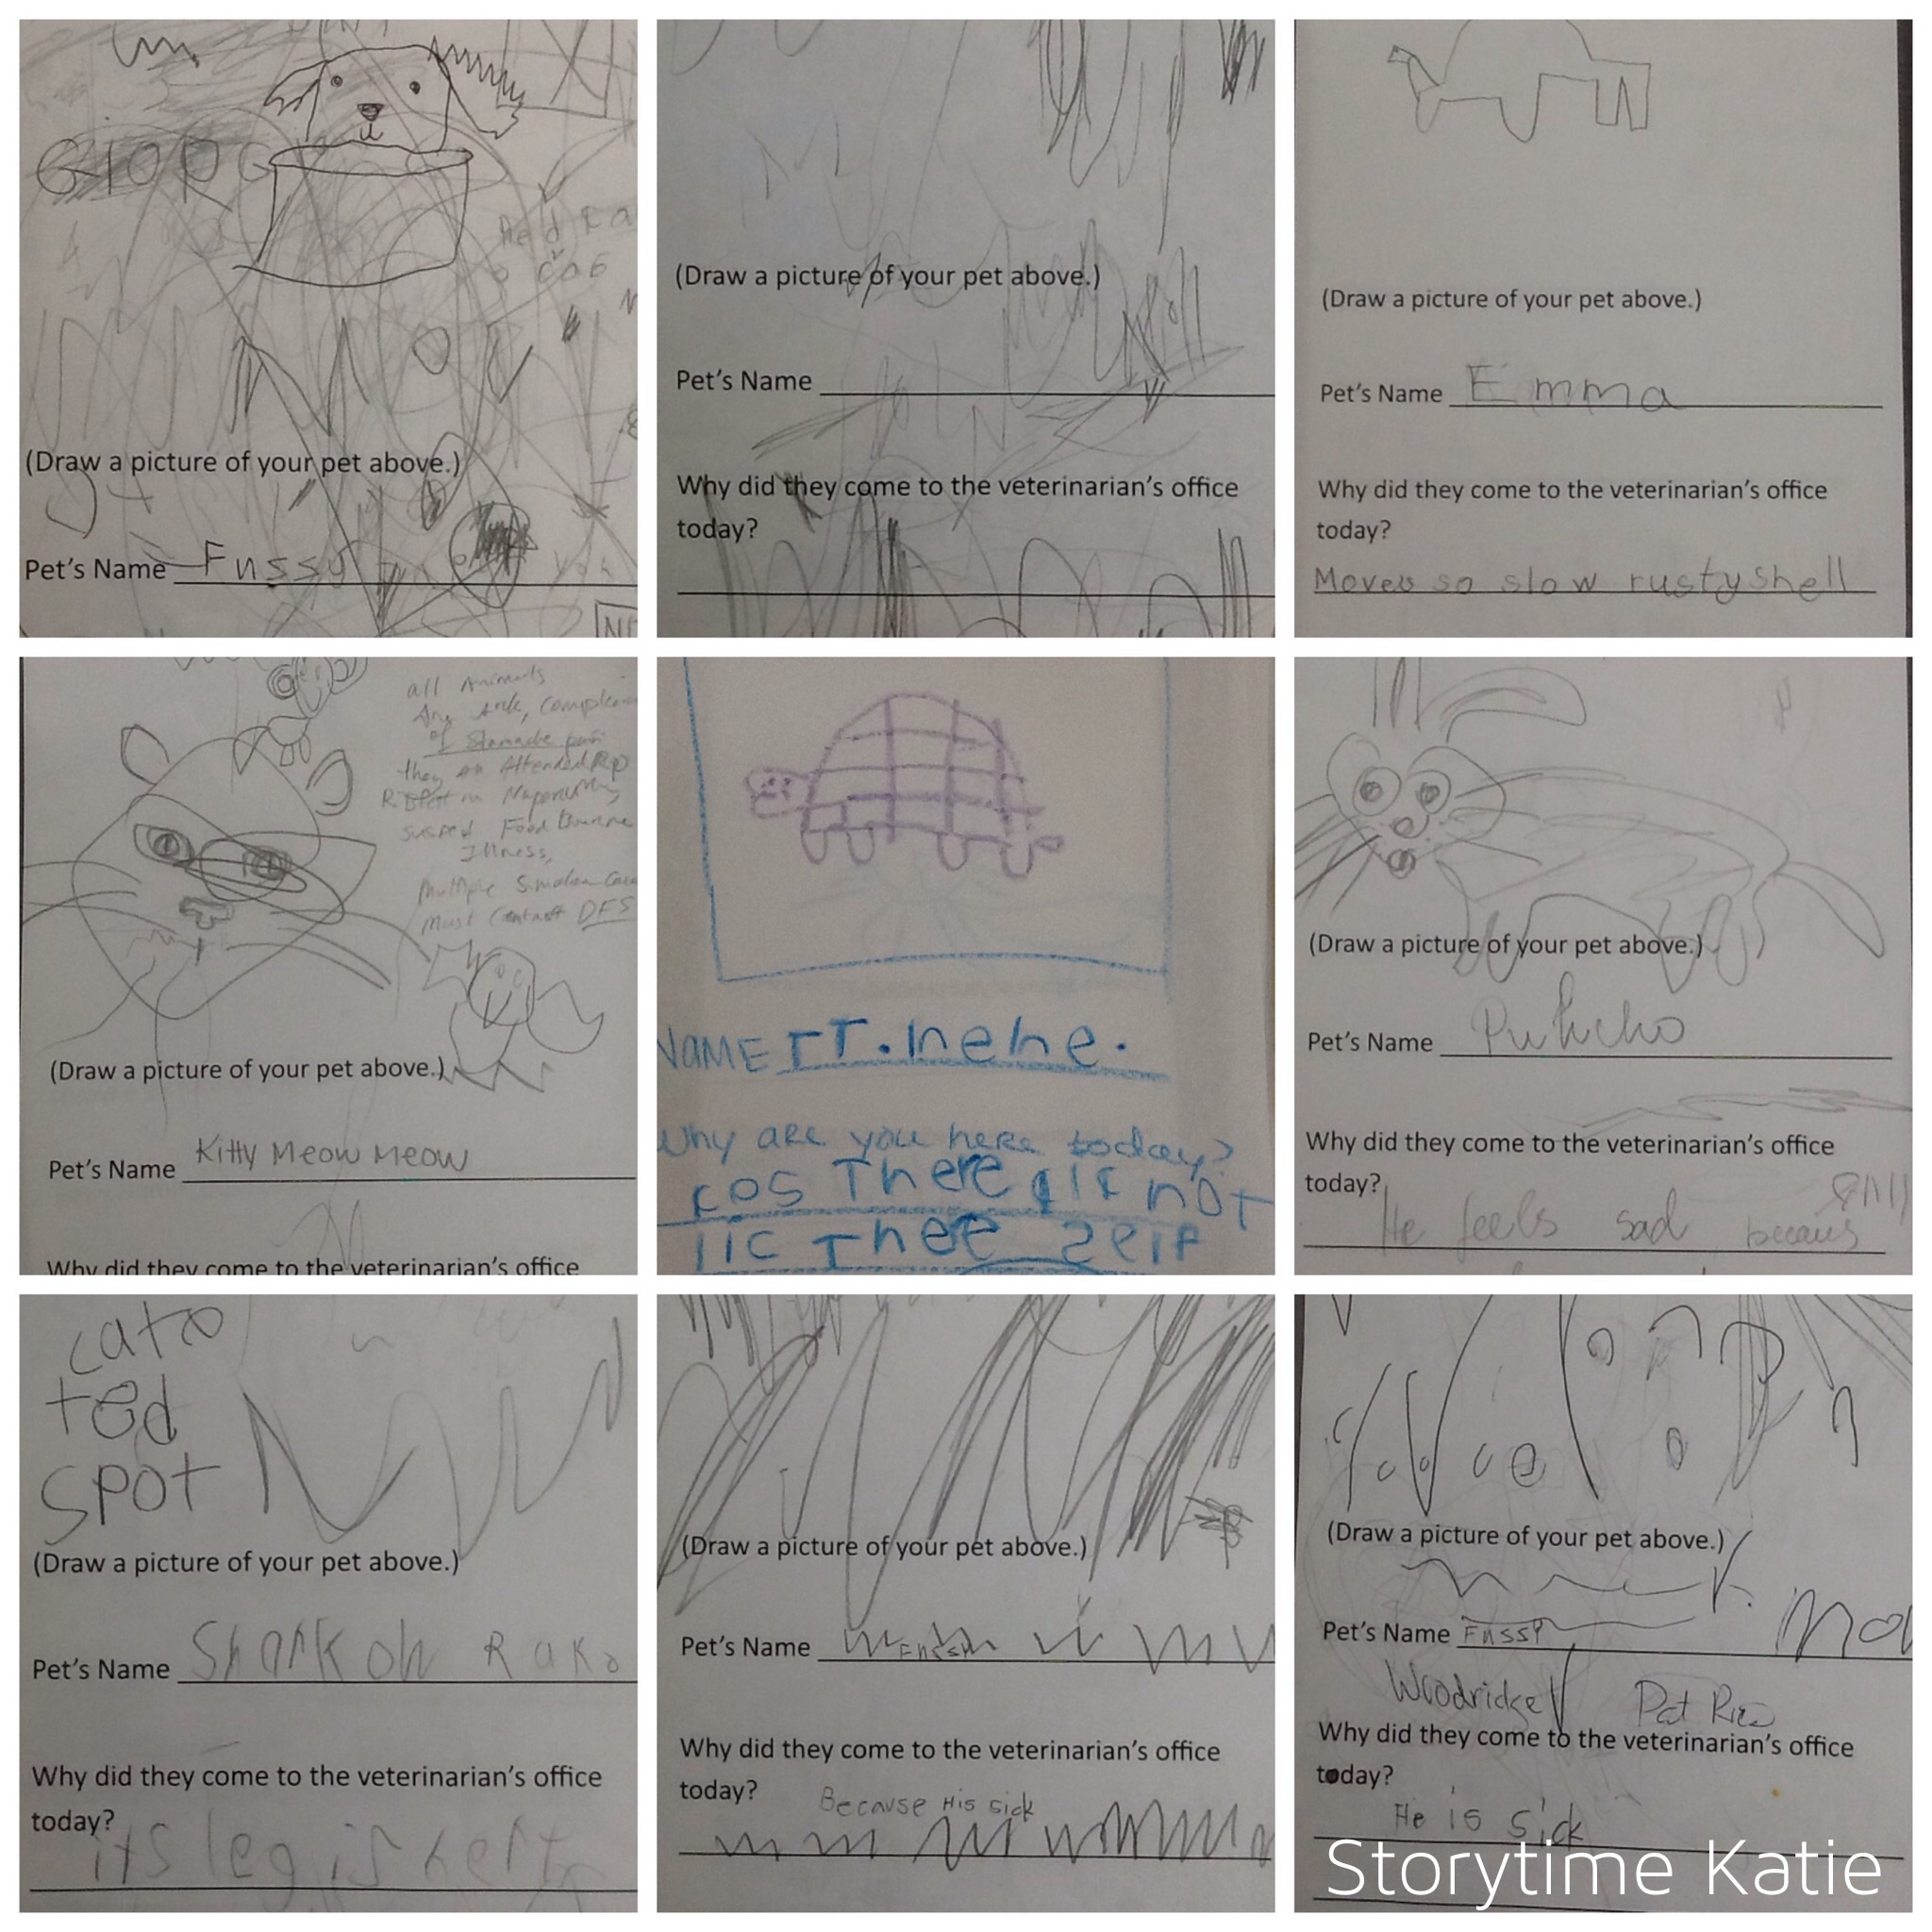
3. All About My Pet: paper & clipboard, no cost.
I made a worksheet for kids to write and talk about why their animals are visiting the veterinarian’s office that day. These were both general supplies found around our workroom. [This was a test situation to see if doing a post office was possible later on. I wanted to see if markers/crayons/pencils would wind up on the walls. In the Parent Tips, it asks parents to accompany their kids to ask for writing utensils at the desk.]

4. Leashes & Collars: $5 for two leashes and three collars from Dollar Tree.
I bought the tiniest collars that I could find and once I adjusted them down to the lowest level, they fit the Beanie Babies. The leashes make for an adorable scene as kids “walk” their animals through the department.

5. Toys: $4.99 for balls from Target & $2 for rope & bone from Dollar Tree.
I wanted to find toys other than dog toys, but nearly every cat toy had me worried about choking hazards — a lot of the ones at Dollar Tree had bells or feathers. I figured that cats would chase balls, right?

6. Veterinarian Tools: $35.99 part of the Vet Kit from Amazon.
I purchased this when it was discounted for $23.99. Watch the price for a while before you buy it; it will go up and down. I loved that this kit came with tons of vet supplies and the carrier was the cutest thing ever.

7. Bowls: $2 from Dollar Tree.
Just a small little touch, but it’s really sweet to see kids making their animals “eat” and “drink” from these. Also a very small purchase!

8. Pet Carriers: one from the Vet Kit & one purchased on eBay for $5.
There are tons of play pet carriers available online and I just wanted to make sure that no fights would break out if I only had one. I was lucky enough to catch the same carrier (though slightly larger) for a small price!

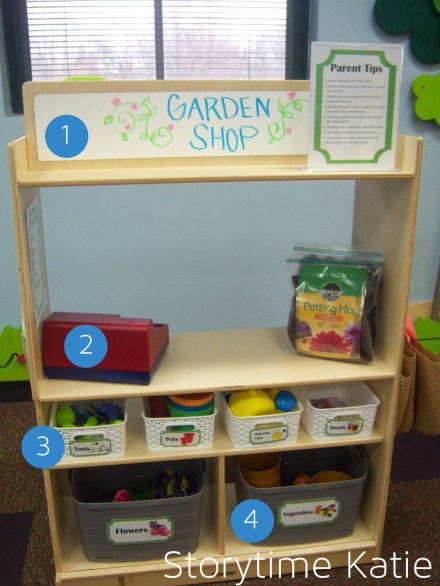
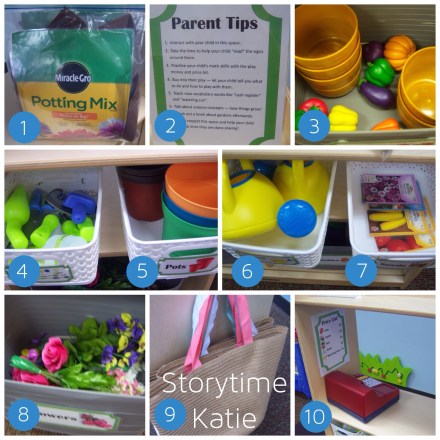
9. Parent Tips: free.
Again, if this was just a play center, I wouldn’t include parent tips. But this is a space where parents and children are supposed to interact. I change the tips each center and it delights me to see when parents are reading them and interacting with their child. (Now that isn’t always the case. But it is my dream!)

10. Animals: Beanie Babies donated from my house.
As a child of the 90s, my sister and I had tons of these creatures. We also were *serious* collectors and had the tags in tag protectors and never played with them. That makes perfect toys in pristine condition all set to be donated to the library now that I’m a children’s librarian!


And just a small example of the fabulous things that the kids have been writing on their play sheets!

image

I’ll be back in a few weeks with an update on how this center did after 300 hours of play!

Interactive Play Space: Bakery Update!

interactiveplayspaces

Nearly a month ago, I posted about the beautiful and gorgeous Bakery play space that I created. Now I’m here to talk about what held up and what didn’t.

[Full disclosure: this month turned into two months once summer reading hit. The Bakery was out for 600 hours of play which is double what the Garden Shop was. I expected to see the items more decimated than they actually were!]

image

1. So, yep, the kids did try to eat some of the pieces. I found a few cookies with what I suspected were bite marks. They immediately were pitched in the trash. (I did the same thing with foam blocks recently — we do not need to keep objects that have teeth marks or that are unsafe for kiddos!)

2. The only truly broken piece was the cupcake displayer. The top of the screw snapped off at some point. I found it during my nightly check and retired the item immediately. I don’t know if it was dropped or manhandled but it wasn’t worth the safety concern of putting it back out. I might try something like this next year to avoid the cost of replacing the no longer made Kidkraft Cupcakes.

3. And let’s talk about theft/loss. The cookies were hit HARD. This is all that was left when I packed up the center. Since it’s such an inexpensive product to replace (around $16 on sale), I’ll likely purchase the Melissa and Doug set again. Originally, I didn’t label them with our library’s name. I might need to do this in the future.

4. The most bizarre piece of destruction that happened — somehow a child managed to get high enough near the play center to tear down the Bakery sign. I lost the letter K and the letter E was mangled. It was a simple felt die-cut fix and I’m not at all worried about the cost of repair ($0.29 for a new felt piece) but more raised eyebrow here.

5. I knew that I’d have to replace the felt cinnamon rolls for the next play center. Grubby hands + lots of velcro pieces on the wooden cupcakes and cookies led to a lot of pilling on the felt. I’m totally okay with replacing these. Plus it will give me a chance to do them a little differently since I’ve read some new techniques on making them!

6. Our two chef hats became one chef hat very early on in the center’s time out in the space. And once I started packing up, I realized it just needed to be thrown out. I’m not sure that I will replace these for the next time the Bakery goes out. I sprayed disinfectant and checked the hat throughout the process, but it got pretty gross looking towards the end.


Last, but not least, a peek at the storage happening:

image

Clockwise from top left: Preparations for Pizzeria, Preparations for Costume Shop, Bakery packed up, and Garden Shop packed up!


I’ll be back at the end of the month with a look at the next play center: Veterinarian Office!

Interactive Play Space: Bakery

interactiveplayspaces

IMG_1067

[A quick recap of the reusuable supplies: Constructive Playthings Create It Space, Target White Plastic Bins, & Target Grey Plastic Bins.]

1. Melissa & Doug Cookie Set from Amazon, $19.99.
I waited for a good price on this set and got it at around $15.99. It’s absolutely perfect if you’re planning on making any kind of bakery. The baking pan, cooking mitt, spatula, and knife were put inside the Cookware bin for storage. I left the cookies, frosting, and the tube in this bin.

2. Flour & Sugar Containers from Target, $2.
I’m the crazy lady that scours through not only the dollar bin, but also the clearance section at Target. These were (I suspect) originally in the dollar bin for $3 each, but I got them for $1 each. I love that the chalkboard labels mean I can re-use these for lots of play centers. I don’t love that chalk easily wipes off.

3. Cinnamon Rolls, approximate cost was $5.97.
To make these, I bought six sheets of each color felt and a tube of white puffy fabric paint. I didn’t follow a tutorial for these and just kind of winged it. I would recommend reading a tutorial if you don’t feel comfortable winging it. (Here are a few.)

4. Green Toys Tea Set from Amazon, $27.99
The one thing I was absolutely willing to pay full price for was a tea set that wasn’t pink. Seeing as a bakery could easily be seen as more “girly” than other centers, I really didn’t want to discourage anyone from using the center. I’m also really happy with how nice the Green Toys line is — made from recycled materials — it has a nice texture to the plastic that makes it much more appealing in my opinion.

5. Bakery Awning, approximate cost was $4.07.
I bought a spool of ribbon and two sheets of turquoise felt. The white and purple felt I had on hand…because I always have yards of felt available. Further information is below!

6. Cookware: Measuring Spoons, Cups, & Muffin Tin from The Dollar Tree, $3.
I bought simple cookware items from the local dollar store. Easy peasy!

7. KidKraft Wooden Cupcakes & Stand from Amazon, $15.95.
For the record, something *weird* is going on with the price on Amazon and I think it has to do with the fact that the product is no longer available on the KidKraft website.

8. Menus, no cost.
I made these in Publisher and the files are below for those of you who would like to re-create them!

9. Melissa & Doug’s Cutting Bread Set, donated (list price $19.99).
This was a donated toy living in our cupboards for a while before I got my hands on it. I knew right away that it would be perfect for the bakery set since I didn’t want to only include sweet treats since bakeries sell bread!


I wish I could walk you through making the awning complete with patterns. But I completely and utterly winged this. I started by cutting the fabric down to the size of the center. I made sure to leave some overhang on either side. I also folded it in half so it was nice and thick. I was ready to start making the awning!

1. I wrapped each end kind of like how you would with a present and wrapping paper. I used a TON of hot glue to glue each line down as I went. I also used three safety pins on each end for each assurance that it wouldn’t fall apart. I also put a lot of hot glue over the safety pins just in case.

2. I folded and hot glued an end piece over my very messy internal work. It makes it look much nice that the first photo, right?

3. I laid more felt over the awning and free-cut the stripes. I used sticky back Velcro to secure it. I also wanted to use Velcro so I could easily change the color of the awning for different centers. I know that I’ll definitely be using the awning again for the pizzeria I’m planning for later in the summer! I already bought the red felt for it.

4. I used our Ellison die-cut machine to cut out the felt letters. Then I simply hot glued them to the ribbon. I used safety pins to attach the sign since I knew I wanted to be able to change that as well.


This center cost a bit more than the Garden Shop. We paid $78.97 for the materials here. But we didn’t need to buy the Melissa & Doug cookies and could have made our own from hardened Model Magic. I didn’t have to insist on having a neutral colored tea set and bought a cheaper pink one. But since I had the budget, I bought the stuff! Full cost of the center is $98.96 which includes our donated Melissa & Doug bread set.

And here are the PDF files:

Bakery Labels

Bakery Menu

Bakery Open/Close Sign

Bakery Parent Tips

I’ll be back next month to discuss how things held up with the bakery!

Interactive Play Space: Garden Shop Update!

interactiveplayspaces

Two weeks ago I posted about how the Garden Shop was created and what it looked like in its pristine condition. Here’s what changed after a month of hard play (nearly 300 hours of play!):

1. Our flowers suffered the most out of anything. Some of the leaves started to fray from constant use. I didn’t do anything to pre-treat the flowers this year, but I might next year. Maybe a coat of fabric spray will help them hold together.

2. I was, however, DELIGHTED that the corks & duct tape stayed on the whole time!

3. And of course, some of the flower bunches lost individual flowers either from use or from a child who needed to take it home. (Which I’m okay with.) This set with the tiny flowers was the one that lost the most. I could hot glue each one to the stem next year, but the cost of the product (I paid $1.19-$1.79 for each bunch) was probably not worth the time taken to glue each flower.

4. The dollar store pots. I lost half of them to crunching and cracking. Given their ability to be destroyed in a child’s hand, I’ll stock up on some extra Menards pots at the end of springtime.

5. I only “lost” one of the Velcro labels due to crunching. I barely even consider this a loss because I wound up not keeping any of the Velcro labels because they were sticky enough after the Velcro dots to not be able to be stored without getting the other labels sticky.

6. Some of the tied labels started to go very early in the process. A co-worker suggested hot-gluing the knots and the problem was resolved after that. So make sure to glue the knots if you’re tying!

All in all, one soil bag was missing (likely thrown out by a helpful patron who saw an empty plastic bag). I threw out the flowers and decided to start again new the next time. And I did print off new labels and laminated them so they are ready for the next time the center comes out.

So moving right along: storage!

1. Get a bin that works for you and your space. Ours are from The Container Store and we have both the medium and large sizes. (These used to store old circulating kits that I’m updating.) I used the large size for the Garden Shop.

2. Store all the flat pieces in a single envelope so that you’re not struggling to find a label the next time you unpack the center.

3. If a large item doesn’t fit, that’s okay. Just store it on the side of the container so you can find it for next time.

4. Label everything!! You want to know the contents before digging through a box. I’ll be making outside labels for each box once we have more than three of them. (Right now it’s easy to tell which box is which, but once I have twelve of these centers, that won’t be the case.)

5. Clean and disinfect everything before storing. I wiped down all the plastic items and let them dry. The brown felt pieces were sprayed with disinfectant and allowed to dry.

Disassembling the play space and preparing everything for storage took an entire morning of work. (Although, I was putting up the Bakery at the same time.) Speaking of the Bakery, I’ll have a post up in two weeks detailing all of the different items in that play space!

Interactive Play Space: Garden Shop!

interactiveplayspaces

Reusable Supplies

So let’s talk about how I used the more permanent features this month:

1. Constructive Playthings Create-It Station, $299.99.
Okay, buying the big piece is always the scariest part of the investment. I was lucky enough to have a coupon code from a previous order that I saved for this one. And I caught a sale. (The coupon code got me free shipping and I want to say the product was marked down to $239.99.) This piece is lovely and versatile. This month, you can see that I had my boss write “Garden Shop” on the top. I also chose to not have the removable white board on and kept the shelves exposed.

2. Learning Resources Cash Register, $39.99.
This was my favorite cash register in all of my searches. I also wound up purchasing it through Amazon, which brought the price down to $26.95 at the time. I had a volunteer laminate the money and pulled the coins for choking hazards since our Family Center serves all ages. The cash register makes small beeps when pressing buttons and a longer sound when opening the drawer, but it’s minimal and we haven’t heard it from our desk.

3. Target White Plastic Bins, $31.99.
I went big and bought nice looking, plastic containers. These were the only items I paid full price for because I thought the size was perfect for our station. And as you can see from the picture, I was right! The signs are laminated, hole punched, and tied to the bins.

4. Target Grey Plastic Bins, $9.99 each.
I got these during the college back-to-school sales earlier this year to organize our puppet collection. We wound up not using them for that purpose and they had been in my house waiting for a purpose. And a purpose was born when I realized they fit into the bottom shelves of the station! The signs are also laminated, but are Velcro-ed on.

Special Garden Shop Supplies

1. Soil Bags (hand-made), approximately $4.
These are two freezer bags (I used a hole punch to carve out holes so that the bag cannot “seal” and suffocate a child) filled with $0.29 brown felt. I left the sheets whole for easier clean-up and the kids just stuff them into the pots to hold up the flowers. I laminated an image of the product that I found online to slide in front of the felt.

2. Parent Tips, absolutely no cost.
Take the time to provide information to your parents about how to use the space and prompts to get them to engage with their child. These took me just a few minutes to hammer out and I’m pleased with what I came up with.

3. Vegetables from Learning Resources Farmers Market Color Sorting Set, $39.99.
This was a re-purpose. I didn’t buy this for the Garden Shop; I bought it for use in a kit. When it didn’t fit in the container, I put it away in a closet at work. When I needed vegetables for my Garden Shop, I remembered about these and pulled them out. (This is another product available on Amazon for a lower price if you’re interested.)

4. Tools from Amazon (Liberty Imports), $15.95.
This was specifically purchased by my boss for me as a surprise for the Garden Center. I do so love surprises! I did not put out the pots, the small wrench, or the plant tag. The pots were too small to hold up our flowers and the wrench/plant tag were small enough that I thought they would just get lost.

5. Pots from Dollar Tree & Menards, approximately $5.
I bought a pack from the dollar store that had six pots in it. The pots are VERY flexible and I thought that they might get crushed by the kids. So I also went to Menard’s and bought some $1.49 pots for more durable pieces.

6. Watering Cans from Amazon, made by Hape, $7.99 each.
Here’s my BIG purchase (in my opinion) for the Garden Shop. The dollar stores did not have child-sized watering cans, Wal-Mart’s were all branded with characters, Target had metal watering cans in the dollar spot, and Five Below only had watering cans that looked like frogs. When I couldn’t find anything I liked in stores, I went online and bought these. Hape is a brand I’m familiar with and I loved the sunny color.

7. Seed Packets (donated), free.
We are launching a Seed Library, so I used packets that were donated as our seeds. The seeds have been placed in our Seed Library envelopes. I laminated the packets to make them last longer.

8. Flowers from Michaels, $1.99-$2.99 each.
These are not a perfect match to the ones I have since I bought in stores. There’s a Michaels on my way home, so I stopped by several times and used a 40% off coupon on each of these flowers so I spent $1.19-$1.79 per bunch instead of the list price. I trimmed the flowers with a set of wire cutters to make them fit into the pots. And to make them safe (since there are wire inside the stems for floral arranging), I also bought corks and the library had duct tape. I put each end into a cork and wrapped duct tape around the cork. This has worked amazingly well because it also stabilizes the flowers to help the kids plant them.

9. Shopping Bags from Target dollar spot, $2 each.
These we will likely reuse for many different stores and shops.

10. Price List, no cost.
I made a price list of the items, using the same picture cues as I had on the tags.

Miscellaneous items the library had on hand: Velcro, ribbon, 3M hooks, duct tape, wire cutters, Expo markers, laminator, paper, display holder.

And a bonus for this month: our sand/water table was out as a bin to plant in:

1. Sand/Water Table
The sand/water table is also from Constructive Playthings and was also purchased on sale for under $200. It is currently at list price $248.99.

2-4. Planting Bed, approximately $7.99
For the planting bed, I used pool noodles that were in my house from my last library (I had bought them to use as limbo sticks) and brown felt left over from another project of mine. I capped each noodle end with brown felt and a rubber band to hold it (2). And I put a TON of hot glue on each end and rubber band. I cut the noodles to fit the bin and wrapped the felt around each noodles, hot gluing the whole way (3 & 4).


My estimation is that the Garden Shop supplies cost $107 full price, if you include buying all the items new. My cost? $54.08 (Which does not include the Farmer Market set since it wasn’t purchased for this or the Planting Bed supplies since it’s material I had on-hand at my house.)

And because I want to make this as easy as possible for anyone to use, I uploaded all my files as PDFs:

Garden Shop Labels
Garden Shop Open & Closed Sign
Garden Shop Parent Tips
Garden Shop Price List
Garden Shop Vegetable & Flower Patch Sign

Check back in a few weeks to see how the materials in the Garden Shop lasted and how I’m storing these play centers for future use!