


[A quick recap of the reusuable supplies: Constructive Playthings Create It Space, Target White Plastic Bins, & Target Grey Plastic Bins.]

1. Melissa & Doug Cookie Set from Amazon, $19.99.
I waited for a good price on this set and got it at around $15.99. It’s absolutely perfect if you’re planning on making any kind of bakery. The baking pan, cooking mitt, spatula, and knife were put inside the Cookware bin for storage. I left the cookies, frosting, and the tube in this bin.
2. Flour & Sugar Containers from Target, $2.
I’m the crazy lady that scours through not only the dollar bin, but also the clearance section at Target. These were (I suspect) originally in the dollar bin for $3 each, but I got them for $1 each. I love that the chalkboard labels mean I can re-use these for lots of play centers. I don’t love that chalk easily wipes off.
3. Cinnamon Rolls, approximate cost was $5.97.
To make these, I bought six sheets of each color felt and a tube of white puffy fabric paint. I didn’t follow a tutorial for these and just kind of winged it. I would recommend reading a tutorial if you don’t feel comfortable winging it. (Here are a few.)
4. Green Toys Tea Set from Amazon, $27.99
The one thing I was absolutely willing to pay full price for was a tea set that wasn’t pink. Seeing as a bakery could easily be seen as more “girly” than other centers, I really didn’t want to discourage anyone from using the center. I’m also really happy with how nice the Green Toys line is — made from recycled materials — it has a nice texture to the plastic that makes it much more appealing in my opinion.
5. Bakery Awning, approximate cost was $4.07.
I bought a spool of ribbon and two sheets of turquoise felt. The white and purple felt I had on hand…because I always have yards of felt available. Further information is below!
6. Cookware: Measuring Spoons, Cups, & Muffin Tin from The Dollar Tree, $3.
I bought simple cookware items from the local dollar store. Easy peasy!
7. KidKraft Wooden Cupcakes & Stand from Amazon, $15.95.
For the record, something *weird* is going on with the price on Amazon and I think it has to do with the fact that the product is no longer available on the KidKraft website.
8. Menus, no cost.
I made these in Publisher and the files are below for those of you who would like to re-create them!
9. Melissa & Doug’s Cutting Bread Set, donated (list price $19.99).
This was a donated toy living in our cupboards for a while before I got my hands on it. I knew right away that it would be perfect for the bakery set since I didn’t want to only include sweet treats since bakeries sell bread!
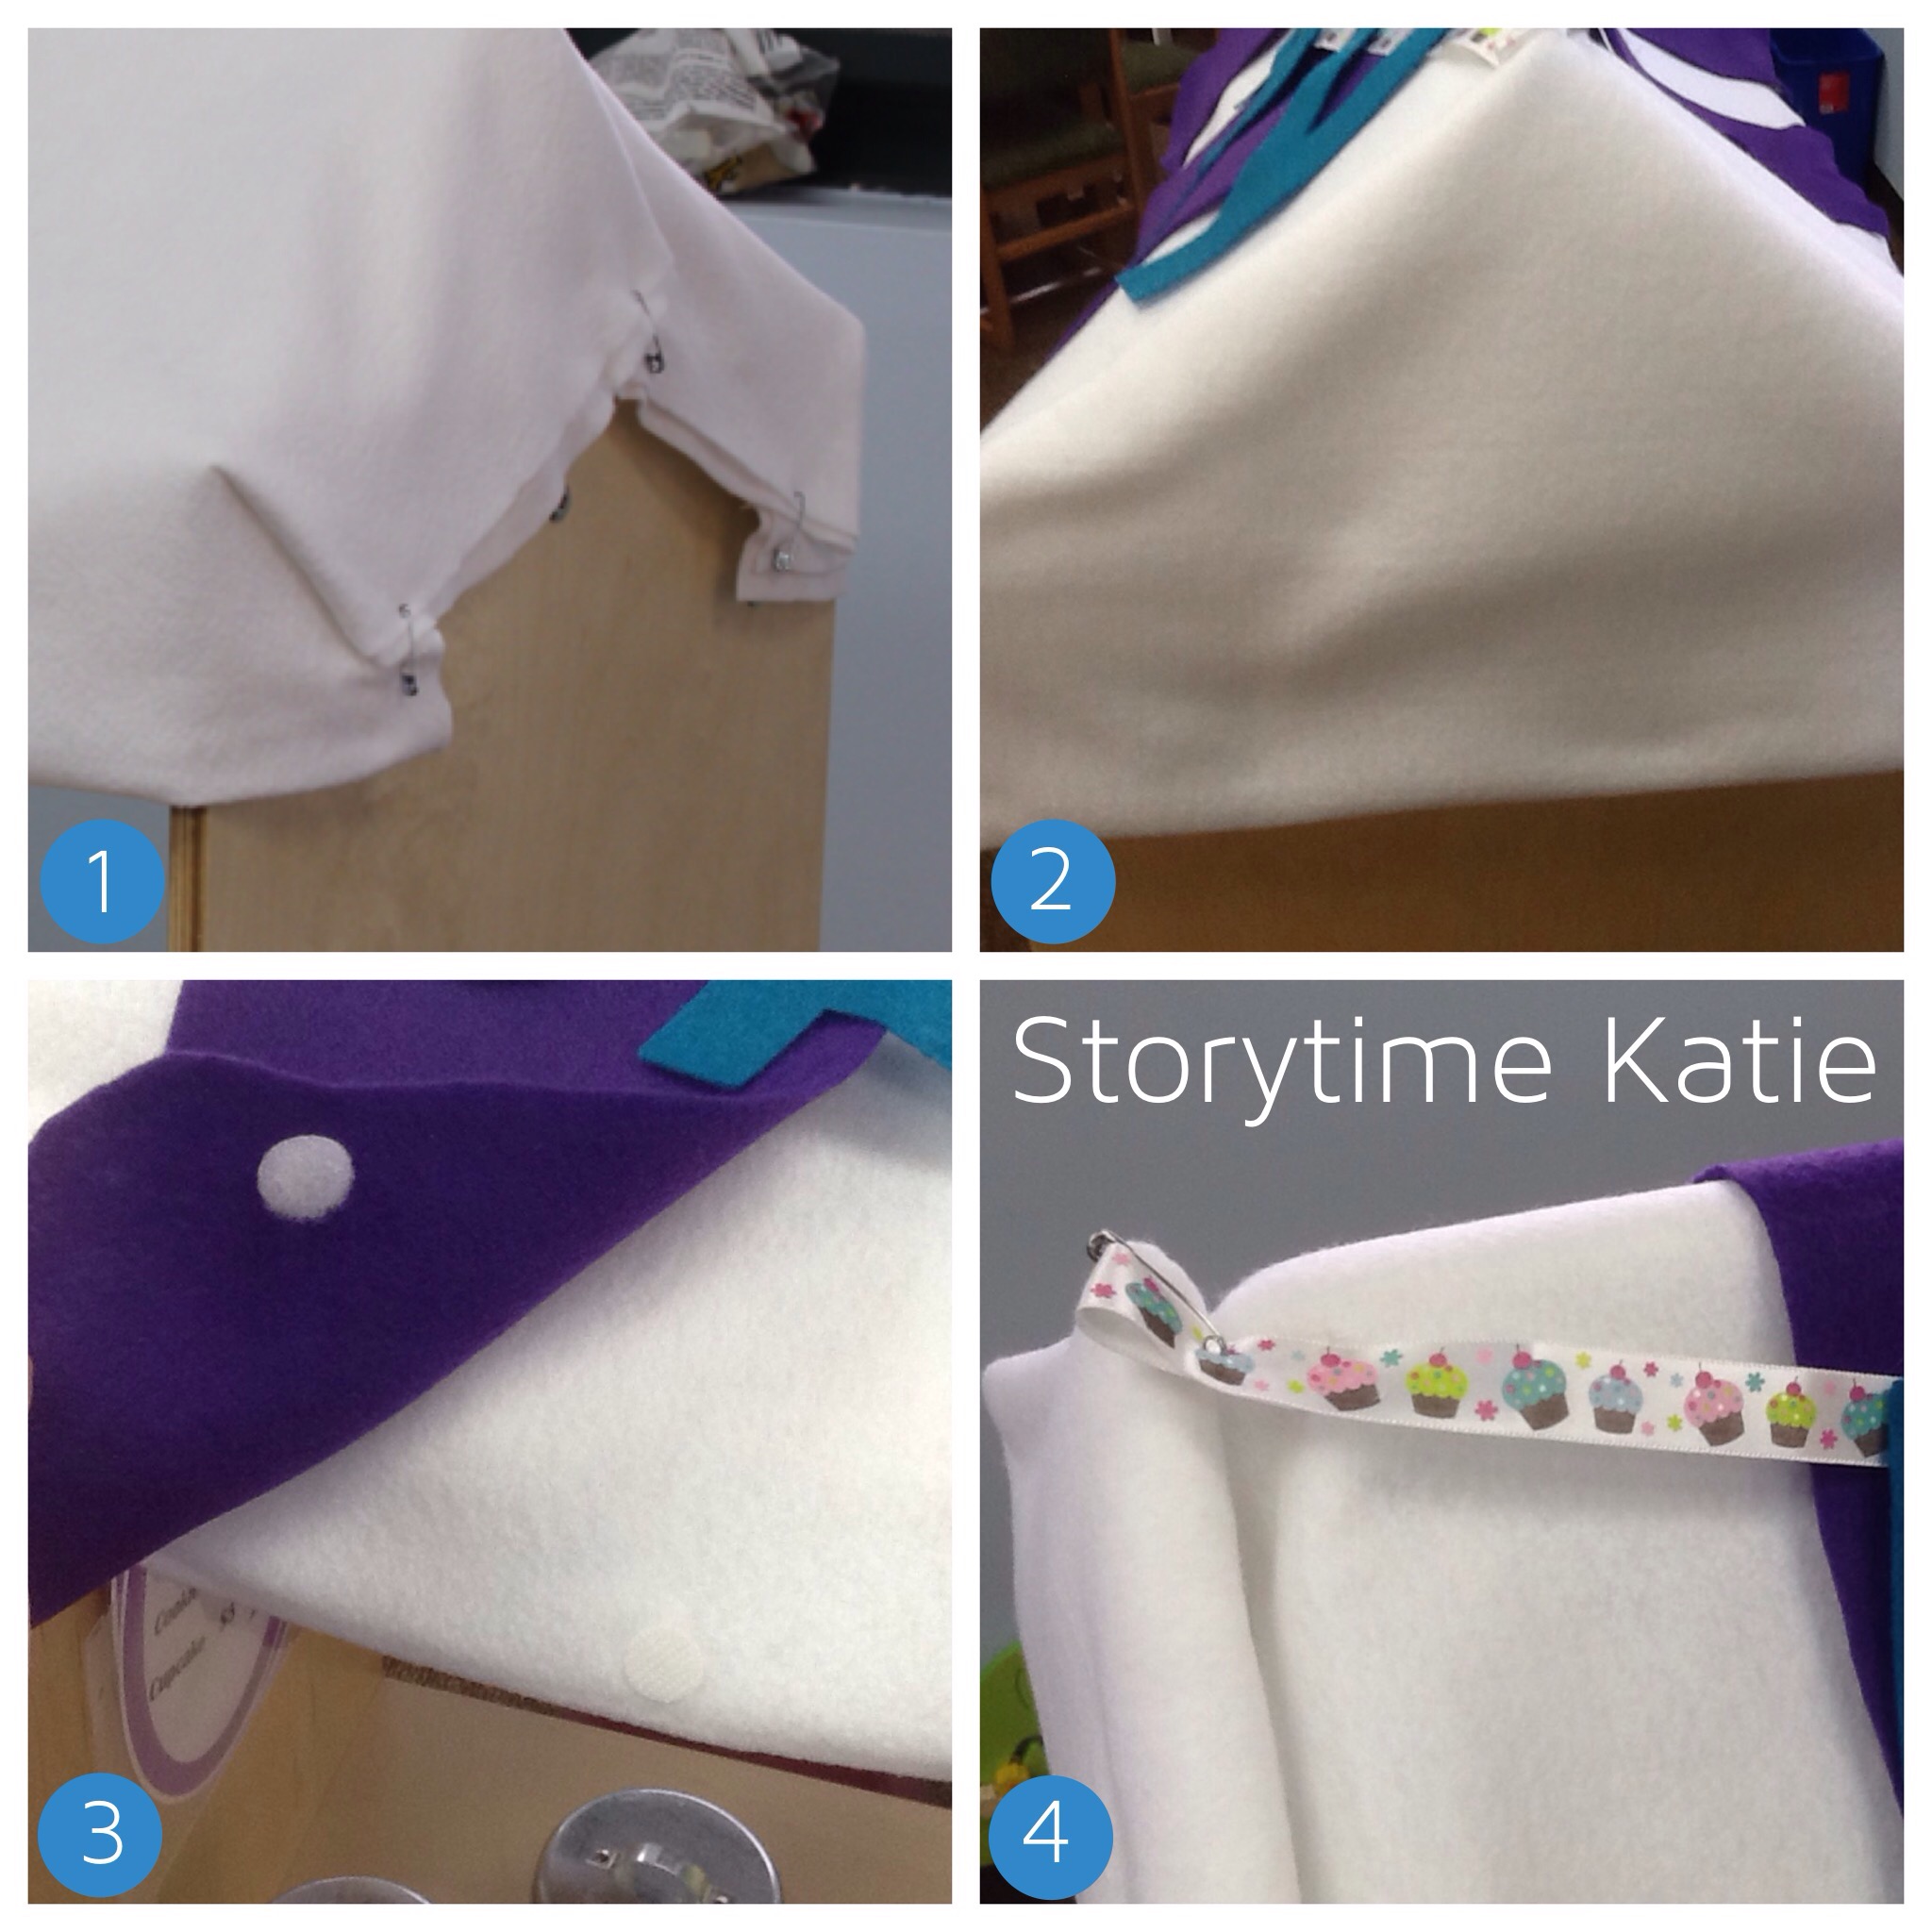
I wish I could walk you through making the awning complete with patterns. But I completely and utterly winged this. I started by cutting the fabric down to the size of the center. I made sure to leave some overhang on either side. I also folded it in half so it was nice and thick. I was ready to start making the awning!
1. I wrapped each end kind of like how you would with a present and wrapping paper. I used a TON of hot glue to glue each line down as I went. I also used three safety pins on each end for each assurance that it wouldn’t fall apart. I also put a lot of hot glue over the safety pins just in case.
2. I folded and hot glued an end piece over my very messy internal work. It makes it look much nice that the first photo, right?
3. I laid more felt over the awning and free-cut the stripes. I used sticky back Velcro to secure it. I also wanted to use Velcro so I could easily change the color of the awning for different centers. I know that I’ll definitely be using the awning again for the pizzeria I’m planning for later in the summer! I already bought the red felt for it.
4. I used our Ellison die-cut machine to cut out the felt letters. Then I simply hot glued them to the ribbon. I used safety pins to attach the sign since I knew I wanted to be able to change that as well.
This center cost a bit more than the Garden Shop. We paid $78.97 for the materials here. But we didn’t need to buy the Melissa & Doug cookies and could have made our own from hardened Model Magic. I didn’t have to insist on having a neutral colored tea set and bought a cheaper pink one. But since I had the budget, I bought the stuff! Full cost of the center is $98.96 which includes our donated Melissa & Doug bread set.
And here are the PDF files:
I’ll be back next month to discuss how things held up with the bakery!


Katie, this is so cute. I’m saving all of your ideas for when we purchase our “market” stand. 1 additional idea would be to have a small kid size table w/chairs so they could eat or drink tea at the Bakery. I know in my small space, this wouldn’t be possible, I wonder if a small wooden tv tray would work?? Thanks for sharing.
That’s a great idea! We have a lot of tables in our space, so I didn’t add anything specifically.